


Before writing your first Spring Batch job, you may want to set up an instance of Spring Batch Admin. It is a customizable web application that can be used to manage your Spring Batch jobs. It’s the counterpart to WebSphere’s Job Management Console (JMC). Once it’s set up, it can be a great way to run and test out your Spring Batch jobs. Even if your organization launches batch jobs through a custom application, Spring Batch Admin can provide additional functionality and serve as a troubleshooting aid.
The first step is to download the sample WAR project that comes bundled with the Spring Batch Admin release. Then, build it and deploy it. The steps below outline how to do so within the Eclipse IDE.
Manual Setup (Eclipse Mars 4.5.1)
- Grab the latest release. At the time of this post, the latest version was 1.3.1.RELEASE.
- Unzip the release and copy the spring-batch-admin-sample folder (located in the sample directory) to your Eclipse workspace.
- Create a new Java project (File-New-Java Project) and name it spring-batch-admin-sample. Select Use default location and Eclipse will detect that the project exists in your workspace. The bottom of the dialog should indicate that Eclipse will automatically configure the project for you.
- Note: The following examples and screenshots assume the project is named spring-batch-admin-sample, but you can certainly rename it to something more meaningful.
- Click Next.

- On the Source tab, navigate to the following folders and add them as source folders (using the folders’ context menu).
- src/main/resources
- src/test/resources
- Configure the output folders. (This configuration is good practice IMO, but not strictly necessary.)
- Check Allow output folders for source folders.
- Set the default output folder to spring-batch-admin-sample/target/classes.
- Set the output folder of the two test source folders to: target/test-classes (not visible in screenshot below).

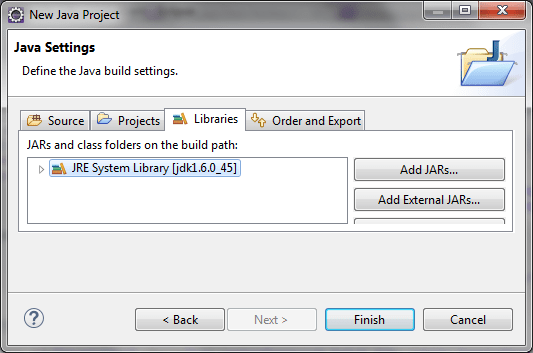
- Java 6 is specified by spring-batch-admin-parent, the parent POM project from which this project inherits. To avoid any conflicts during Maven updates, specify a version 6 JRE. We could try to override this and specify a more recent java version, but we’ll keep this example simple and stick to Java 6.
- Click Finish.
- Add the Maven Nature by right-clicking on the project and selecting Configure-Convert to Maven Project.
- Verify that the Spring nature was added by going to the Project Explorer view and verifying that a Spring Elements heading exists. If not, add the Spring nature by right-clicking on the project and selecting Spring Tools-Add Spring Project Nature.
- Perform a Maven build in Eclipse through the M2E plugin.
STS Setup (Not Recommended)
The Spring Batch Admin documentation recommends using the most recent version of the Spring Tools Suite (STS) Eclipse Plugin to import the Spring Batch Admin sample application through Eclipse. However, it uses a very old version of Spring Batch Admin: 1.0.0.M1. The current version is 1.3.1.RELEASE. Theoretically, you could change the version in the POM file to use the current spring batch admin libraries and parent project. However, you would then need to update other dependencies and probably make many other changes before the project built and ran correctly. It’s best to opt for the manual setup described above. The steps below outline how you would use STS to set up Spring Batch Admin if/when it is updated to use the current release.
- If you don’t have the STS plugin, get it from the STS Downloads Page and add it to your Eclipse installation.
- Create a new Spring Legacy Project and click Next.
- Specify a name for the project.
- Choose the Spring Batch Admin Webapp template.
- Click Finish.
Data Source Configuration
By default, Spring Batch Admin is configured to save your job execution data to an in-memory HSQL database. That means that all of the job execution data is gone every time you restart your server. At some point, you will almost certainly want to modify Spring Batch Admin to save your job execution data to a persistent data store.
Out of the box, Spring Batch Admin is designed to identify the type of your data source through the ENVIRONMENT system property. If the ENVIRONMENT property is set, the Spring properties file named batch-<ENVIRONMENT>.properties will be loaded, if it exists on the class path. This properties file should contain the properties associated with the specified data source.
For example, to configure Spring Batch Admin to use a MySQL data source, you could do the following:
- Specify mysql as the database type through a VM argument when starting the application.
- -DENVIRONMENT=mysql
- Place batch-mysql.properties on the class path.
The Spring Batch Admin documentation points out that switching between database types based on the ENVIRONMENT property is merely a suggested practice. Developers are free to override this behavior with their own methodology.
A sample MySQL properties file comes bundled with the Spring Batch Admin sample project. It’s a great starting point if you’d like to use a MySQL data source.
# Placeholders batch.*
#    for MySQL:
batch.jdbc.driver=com.mysql.jdbc.Driver
batch.jdbc.url=jdbc:mysql://localhost/test
batch.jdbc.user=test
batch.jdbc.password=test
batch.jdbc.testWhileIdle=true
batch.jdbc.validationQuery=SELECT 1
batch.jdbc.defaultAutoCommit=false
batch.schema.script=classpath:/org/springframework/batch/core/schema-mysql.sql
batch.drop.script=classpath*:/org/springframework/batch/core/schema-drop-mysql.sql
batch.business.schema.script=classpath:/business-schema-mysql.sql
batch.database.incrementer.class=org.springframework.jdbc.support.incrementer.MySQLMaxValueIncrementer

# Non-platform dependent settings that you might like to change
batch.data.source.init=false
The list of supported database types includes derby, h2, hsql, mysql, oracle, postgresql, sqlf, sqlserver, and sybase. A sample properties file for each of these can be found in the spring-batch-samples project.
There are three properties that specify SQL script locations:
- batch.schema.script: Specifies the location of the SQL commands for creating the Spring Batch metadata tables. The sample properties file for each DB type sets this to the appropriate location. Script files for the supported DB types are provided by the spring-batch-core project.
- batch.drop.script: Specifies the location of the SQL commands for dropping the Spring Batch metadata tables. The sample properties file for each DB type sets this to the appropriate location. Script files for the supported DB types are provided by the spring-batch-core project.
- batch.business.schema.script: Specifies the location of developer-supplied SQL commands for adding any additional tables used by the business logic in the batch jobs.
Other database types could potentially be used by creating the other versions of these scripts.
The scripts described above are used to drop and create the tables if the batch.data.source.init property is set to true. If you would like to keep your data between deployments, set it to false after your first deployment so that your tables are subsequently preserved. Managing the creation of your tables in this way is a neat feature that is useful in a development/test environment. In a production setting, you’d want to have a different process for managing the creation of your tables.
Other Configuration Options
The application is bootstrapped with reasonable default settings defined in META-INF/spring/batch/bootstrap. These settings can be overridden through Spring XML configuration files placed in META-INF/spring/batch/override. Here, you can override the data source, transaction manager, job launcher, and many other settings. For more detailed guidance, see the Spring Batch Admin documentation.
Adding Your Jobs
You could add your batch jobs directly to the Spring Batch Admin WAR project that we created together earlier. However, I recommend placing your Spring Batch jobs in a different project. By decoupling your job code in this way, you are free to more easily integrate your jobs into other applications. In addition to being able to add your jobs to the Spring Batch Admin web application, you could add them to your own custom application, run them from the command line, etc.
Here are some configuration guidelines for creating your batch jobs project:
- Create a Maven JAR project.
- You’ll need at least these two dependencies to write your batch jobs.
- spring-batch-core
- spring-batch-infrastructure
- To ensure that shared dependencies have the same version numbers, set the Maven parent as the same one used by your Spring Batch Admin project.
- We’ve used spring-batch-admin-parent in our examples, but you might have a company-specific parent that you need to use in all your projects. In that case, you’ll need to merge the contents of spring-batch-admin-parent into your other POMs (and resolve any conflicts that arise).
- XML Job Definitions
- Place them in META-INF/spring/batch/jobs in your batch jobs JAR.
Adding your jobs project as a dependency to the Spring Batch Admin web project (the one we created earlier) will make those jobs available to run, manage, and monitor through its interface when it’s deployed.
Spring Batch Basics
Spring Batch job configurations can be simple, or they can be as complicated as they need to be. We’ll leave the nitty gritty details to another post. For now, let’s review the basics.
A Job is comprised of one or more Steps. Steps are commonly used to process a set of data ‘items.’ There are three important components of a data processing step to understand:
- ItemReader
- Specifies the logic used to read input data.
- ItemProcessor
- Optional component that specifies the logic used to process each item read by the ItemReader. If the input data needs to be manipulated in any way, implement the logic to do so in an ItemProcessor. You can even transform the input data to a different type.
- ItemWriter
- Specifies the logic used to write out data to the database, output file, etc. Steps can be configured to ‘chunk’ the data so that multiple items are queued up and written at once in order to improve efficiency.
Spring Batch provides a rich framework for tailoring batch jobs to your specific needs. For an in-depth understanding of all the Spring Batch components and configuration options available, refer to the Spring Batch documentation.
Sample Job
Below is the Java configuration for a sample Spring Batch job that contains a single Step. The ItemReader ingests an input file containing a message on each line. The ItemProcessor converts each message to all uppercase. The ItemWriter then persists the processed messages to the database.
We are going to define our jobs using an annotation-based configuration. Our Spring XML configuration, which we placed in META-INF/spring/batch/jobs, is minimal.
<?xml version="1.0" encoding="UTF-8"?>
<beans xmlns="http://www.springframework.org/schema/beans"
	xmlns:xsi="http://www.w3.org/2001/XMLSchema-instance"
	xmlns:context="http://www.springframework.org/schema/context"
	xsi:schemaLocation="
		http://www.springframework.org/schema/batch http://www.springframework.org/schema/batch/spring-batch.xsd
		http://www.springframework.org/schema/beans http://www.springframework.org/schema/beans/spring-beans.xsd
		http://www.springframework.org/schema/context
		http://www.springframework.org/schema/context/spring-context-3.2.xsd">

	<context:annotation-config/>
	<context:component-scan base-package="com.intertech.batch.job"/>
</beans>
Next, we’ll write our SampleJobConfiguration class. It contains Spring annotations, so place it somewhere underneath the annotation scan base package specified in the XML configuration file.
Adding the @EnableBatchProcessing annotation causes some useful beans to be instantiated and placed in the Spring context: JobRepository, JobLauncher, JobRegistry, PlatformTransactionManager, JobBuilderFactory, and StepBuilderFactory. This annotation only needs to be added to one of the configuration classes.
package org.intertech.batch.job.sample;

import java.util.List;

import javax.sql.DataSource;

import org.springframework.batch.core.Job;
import org.springframework.batch.core.JobParametersIncrementer;
import org.springframework.batch.core.Step;
import org.springframework.batch.core.configuration.annotation.EnableBatchProcessing;
import org.springframework.batch.core.configuration.annotation.JobBuilderFactory;
import org.springframework.batch.core.configuration.annotation.StepBuilderFactory;
import org.springframework.batch.core.launch.support.RunIdIncrementer;
import org.springframework.batch.item.ItemProcessor;
import org.springframework.batch.item.ItemReader;
import org.springframework.batch.item.ItemWriter;
import org.springframework.batch.item.file.FlatFileItemReader;
import org.springframework.batch.item.file.LineMapper;
import org.springframework.batch.item.file.mapping.BeanWrapperFieldSetMapper;
import org.springframework.batch.item.file.mapping.DefaultLineMapper;
import org.springframework.batch.item.file.transform.DelimitedLineTokenizer;
import org.springframework.beans.factory.annotation.Autowired;
import org.springframework.context.annotation.Bean;
import org.springframework.context.annotation.Configuration;
import org.springframework.core.io.ClassPathResource;
import org.springframework.jdbc.core.JdbcTemplate;

@Configuration
// Tell Spring to automatically create the beans to provide a basic configuration.
@EnableBatchProcessing
public class SampleJobConfiguration {
  @Autowired
  private JobBuilderFactory jobBuilderFactory;

  @Autowired
  private StepBuilderFactory stepBuilderFactory;

  private JdbcTemplate jdbcTemplate;

  @Bean
  public Job sampleJob() {
    return jobBuilderFactory.get("sampleJob")
                    .incrementer(sampleIncrementer())
                    .start(sampleStep1())
                    .build();
  }

  @Bean
  public ItemReader<SampleMessage> sampleReader() {
    FlatFileItemReader<SampleMessage> itemReader = new FlatFileItemReader<SampleMessage>();
    itemReader.setLineMapper(sampleLineMapper());
    itemReader.setResource(new ClassPathResource("helloworld.csv"));
    return itemReader;
  }

  @Bean
  public ItemProcessor<SampleMessage, SampleMessage> sampleProcessor() {
    return new ItemProcessor<SampleMessage, SampleMessage>() {
      @Override
      public SampleMessage process(SampleMessage item) throws Exception {
        // Change the message type and text to uppercase.
        item.setType(item.getType().toUpperCase());
        item.setContent(item.getContent().toUpperCase());
        return item;
      }
    };
  }

  @Bean
  public ItemWriter<SampleMessage> sampleWriter() {
    return new ItemWriter<SampleMessage>() {
      @Override
      public void write(List<? extends SampleMessage> messages) throws Exception {
        for (SampleMessage message : messages) {
          jdbcTemplate.update("INSERT INTO message (message_type, message_text) VALUES (?, ?)", message.getType(),
                  message.getContent());
        }
      }
    };
  }

  @Bean
  public LineMapper<SampleMessage> sampleLineMapper() {
    // We are reading in a CSV file, so set a ',' as the delimiter.
    DelimitedLineTokenizer lineTokenizer = new DelimitedLineTokenizer(",");
    lineTokenizer.setNames(new String[] { "type", "content"});

    // The lines in our file map to the SampleMessage class.
    BeanWrapperFieldSetMapper<SampleMessage> fieldSetMapper = new BeanWrapperFieldSetMapper<SampleMessage>();
    fieldSetMapper.setTargetType(SampleMessage.class);

    // Use the field delimiter and field set mapper to define our line mapper.
    DefaultLineMapper<SampleMessage> lineMapper = new DefaultLineMapper<SampleMessage>();
    lineMapper.setLineTokenizer(lineTokenizer);
    lineMapper.setFieldSetMapper(fieldSetMapper);
    return lineMapper;
  }

  @Bean
  JobParametersIncrementer sampleIncrementer() {
    // Simple Spring-provided JobParametersIncrementer implementation that increments the run id.
    return new RunIdIncrementer();
  }

  @Bean
  protected Step sampleStep1() {
    return stepBuilderFactory.get("sampleStep1").<SampleMessage, SampleMessage> chunk(5).reader(sampleReader())
                    .reader(sampleReader())
                    .processor(sampleProcessor())
                    .writer(sampleWriter())
                    .build();
  }

  @Autowired
  public void setDataSource(DataSource dataSource) {
    jdbcTemplate = new JdbcTemplate(dataSource);
  }
}
Here is the SampleMessage class. It’s just a POJO.
package org.intertech.batch.job.sample;

public class SampleMessage {
    private String type;
    private String content;

    public String getType() {
        return type;
    }

    public void setType(String type) {
        this.type = type;
    }

    public String getContent() {
        return content;
    }

    public void setContent(String content) {
        this.content = content;
    }
}
Below is the SQL command used to create the table used by our ItemWriter . It was placed in business-schema-mysql.sql.
CREATE TABLE `test`.`message` (
   id INT NOT NULL PRIMARY KEY AUTO_INCREMENT,
   message_type VARCHAR (16) NOT NULL,
   message_text VARCHAR (128) NOT NULL
);
The file read by our ItemWriter is just a simple CSV file.
Greeting,Hello World!
Statement,It's me!
Deploying
Deploy the Spring Batch Admin web application to a web server as you would any other WAR file. I used Apache Tomcat. As you can see, it doesn’t take much to get going. All you really need is a web server, your Spring Batch Admin project, and your batch jobs.
The web interface should be self-explanatory as you navigate through the different screens. In addition, the home page provides a detailed list of URLs and functionality. There is even a JSON API.

The jobs from your jobs project should be listed on the Jobs screen (assuming your jobs project was included as a dependency in Spring Batch Admin).

For further reading, please see the Spring Batch and Spring Batch Admin documentation that has been mentioned throughout this post.


Thanks for your article.
A question about the job deployment: They are jar archives that are placed in folder WEB-INF/lib/ and picked up during deployment of Admin Web application?
Hi Rainer,
Yes, the JAR containing your jobs should be in the WEB-INF/lib folder located inside your WAR. The Maven build will place it there as long as you correctly set it as a dependency in your WAR project’s POM file. For example:
com.mycompany.batch.jobs
my-spring-batch-jobs
0.0.1-SNAPSHOT
In your jobs project, remember to place the Spring configuration XML file(s) specifying your jobs in META-INF/spring/batch/jobs. Either define your jobs directly in the XML or use a Java-based approach as demonstrated in this post.
Thanks for taking the time to read this post, and let me know if you have any more questions!
Thanks for clarification!
One additional question:
The SampleJobConfiguration is using the @EnableBatchProcessing annotation. From my experience, this annotation causes some troubles when deploying the configuration in Spring Batch Admin, as SPA is already defining beans like jobRepository, … and the annotation causes Spring Core to create those beans (again).
Do you made some adjustments in your Configuration classes to get your jobs running on Spring Batch Admin? I am only able to use java-based Job Configurations in Spring Batch Admin this way:
– do not use @EnableBatchProcessing
– do not autowire JobBuilderFactory and StepBuilderFactory
– autowire jobRepository and transactionManager (provided by Spring Batch Admin ROOT application context)
– create JobBuilderFactory using “new JobBuilderFactory(jobRepository);” for building jobs.
– create StepBuilderFactory using “new StepBuilderFactory(jobRepository, transactionManager);” for building steps.
Greetings, Rainer
Hello Rainer,
I didn’t make any additional adjustments to the configuration to get the jobs running. I haven’t seen any issues when running my sample application. However, I do see your point that the @EnableBatchProcessing annotation is redefining beans already defined by Spring Batch Admin and that this could potentially cause problems. Would you mind sharing exactly what issues you ran into when you used @EnableBatchProcessing?
I am Using Spring batch to (Reader, processor, Writer) insert CSV (coming from other services) data into database . Batch running information saves into Batch tables (Created by batch Spring batch itself) . Now to monitor, to get the job status and related information. Can you please guide how I can use JSON API to display batch related information in my own UI. Not able to configure it.
Hi Dinesh,
Thanks for reading the article. The JSON API should be functional without any further configuration. I just fired up the sample application described in the article to double check. Can you provide some more details on the issues you are experiencing?
can I conect my spring batch admin to a database no-relational ? for example Mongo. i need know if i can save my jobs tracking in a MONGODB
Hi. Thanks for your comment. I do not believe there is any support for storing job tracking information in a non-relational DB. The job-tracking data needs to accurately reflect the state of the job. The lack of support for atomic transactions across multiple documents in MONGODB would make it difficult to accomplish that.
my Project is not opening home page its given 404 error ?